A powerful tool that may be used for both ethical and unethical objectives, Kali Linux is a Debian-based Linux distribution that was created especially for penetration testing and security audits. It is important to use Kali Linux responsibly and ethically, only on systems with allowed access. In this article, we explain how to install Kali Linux and this will be useful for beginners around the world.
Key Features of Kali Linux
Here are the important features of Kali Linux:
- Hundreds of pre-installed tools: Numerous tools for different security tasks are included with Kali Linux, including:
- Network Analysis: Nmap and Wireshark
- Vulnerability Assessment: Metasploit, Nessus
- Cracking Passwords: Hydra, John the Ripper
- Wireless Assaults: Kismet, Aircrack-ng
- Reverse Engineering: GDB, IDA Pro
- Customizable: Installing extra tools or packages and modifying the system are simple tasks for users.
- Open-source: Kali Linux is available to a broad spectrum of users because of its free and open-source nature.
- Community Support: A sizable and vibrant community offers resources, lessons, and support.
Use Cases of Kali Linux:
- Penetration Testing: Finding and taking advantage of weaknesses in networks and systems is known as penetration testing.
- Security Auditing: Evaluating the security posture of networks and systems is known as security auditing.
- Digital Forensics: Data recovery and investigation of digital evidence.
- Security Research: Researching novel security risks and weaknesses is known as security research.
- Education and Training: Acquiring knowledge of cybersecurity principles and instruments.
Installation Guide for Kali Linux
System Requirements for Installing Kali Linux:
The minimum system requirements for installing Kali Linux are:
- Processor: 1 GHz or faster (32-bit or 64-bit)
- RAM: 2 GB or more (recommended: 4 GB or more)
- Hard disk space: 20 GB or more
- CD/DVD drive or USB port: For installation media
- An ISO image of Kali Linux: Download the appropriate version (64-bit or 32-bit) from the official website.
- A bootable USB drive or DVD: To create a bootable media.
Important Notes:
- Backup Data: Make a backup of your computer’s vital data before installing Kali Linux.
- Be careful when using: Kali Linux is a potent weapon that has both morally right and wrong uses. Make ethical and responsible use of it.
Here’s a general outline of the installation process:
Create Bootable Media:
USB Drive: Use a tool like dd (for Linux) or Rufus (for Windows) to create a bootable USB drive.
DVD: Burn the ISO image to a DVD.
- Boot from Bootable Media:
- Restart your computer.
- Enter the BIOS/UEFI settings and change the boot order to prioritize the bootable media (USB drive or DVD).
- Start the Kali Linux Installer:
- The Kali Linux installer will start automatically.
- Select your language and keyboard layout.
- Choose Installation Method:
- Guided installation: The easiest option for most users.
- Manual partitioning: Provides more control but requires more technical knowledge.
- Configure Partitions:
- Guided installation: The installer will automatically create partitions.
- Manual partitioning: You’ll need to create partitions for root, swap, and home directories.
- Set up Networking: Choose your network interface and configure network settings if necessary.
- Configure Software: Select the software you want to install (e.g., desktop environment, kernel headers).
- Create User Account: Create a root user (administrator) and a standard user account.
- Install Kali Linux: The installer will start copying files to the hard drive.
- Reboot:
<!– end list –>
Once the installation is complete, remove the bootable media and reboot your computer.
<!– end list –>
Log in:
<!– end list –>
Log in to your Kali Linux system using the credentials you created during the installation.
Suggested: Blockchain Training in Chennai.
Kali Linux Installation Procedure
Boot:
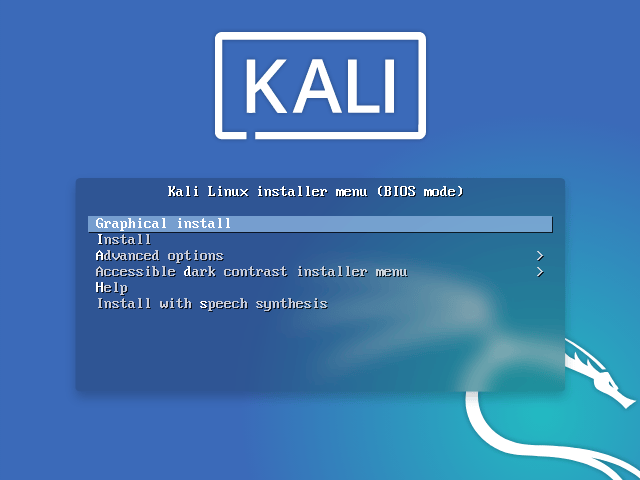
Boot with the installation medium of your choice to begin the installation process. The Kali Linux Boot screen ought to appear when you first arrive. Select Install (Text-Mode) or Install Graphically. We decided to use the Graphical install in this instance.
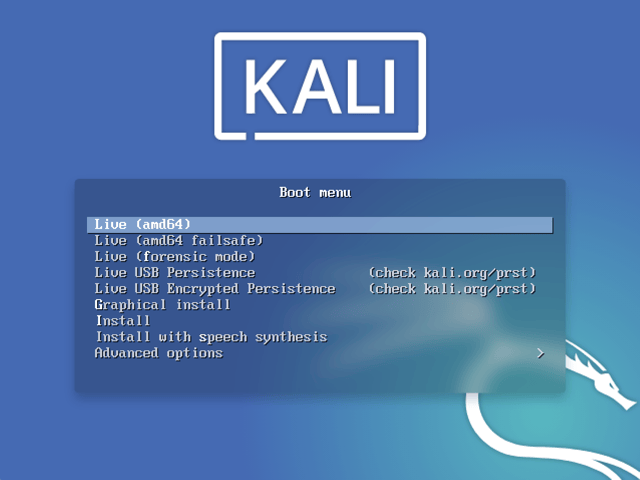
You will see another mode, Live, which is also the default boot option, if you are using the live image instead.
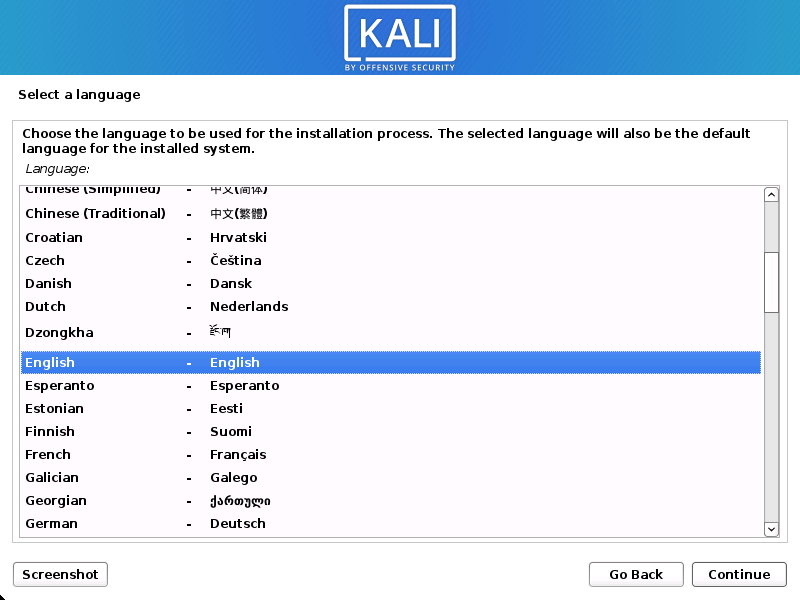
Language:
Choose the language that you like. Both the setup procedure and utilizing Kali Linux will make advantage of this.
Locate:
Specify your geolocation and select your keyboard layout.

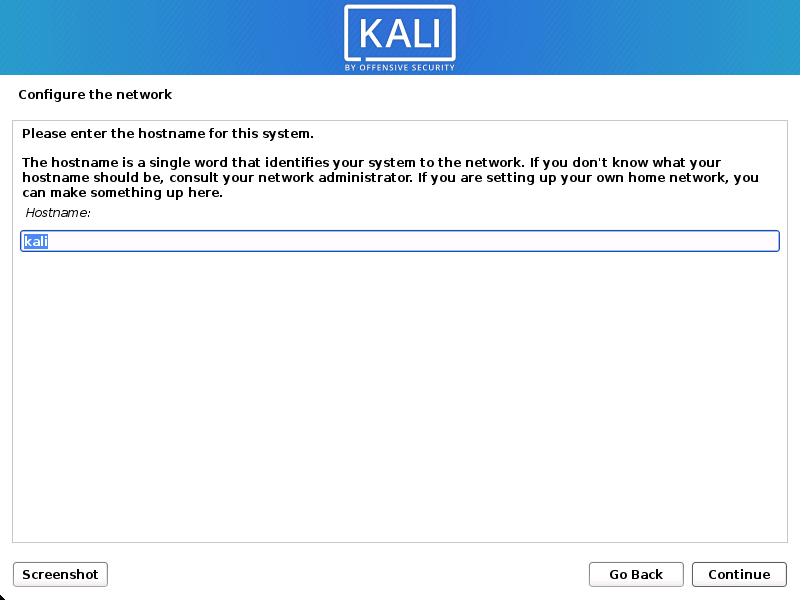
Network:
After searching for a DHCP service and probing your network interfaces, the setup will ask you to input your system’s hostname. Kali is the hostname that we have entered in the example below.
- After searching for network interfaces, it will prompt you to manually enter the network information if there isn’t a DHCP service operating on the network. You can choose to skip this step.
- You must either create a custom Kali Linux ISO with the drivers already included or include them when prompted if Kali Linux is unable to recognize your NIC.
- The setup could ask you which NIC to use for the install if it finds more than one.
- You will be prompted for your wireless network details before being asked for a hostname if the selected NIC is 802.11 based.
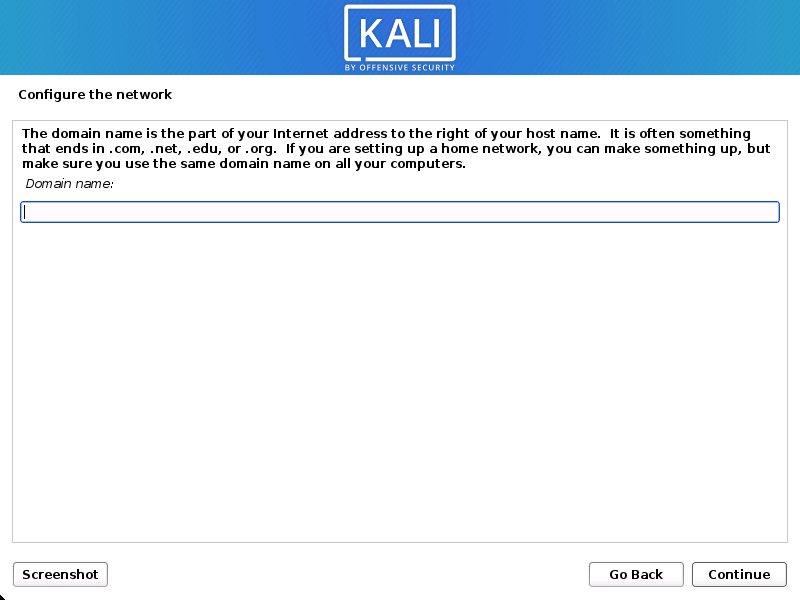
You can choose to give this machine a default domain name (values can be taken via DHCP or if an operating system is already installed).
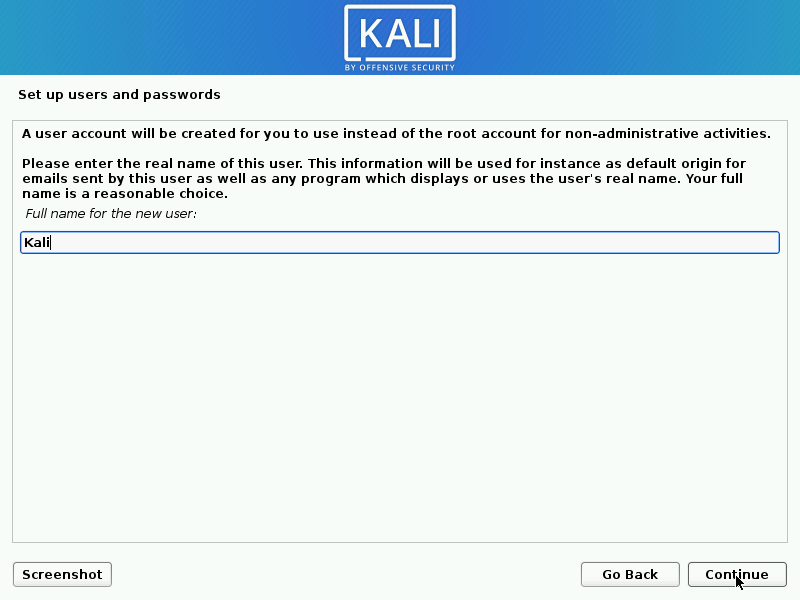
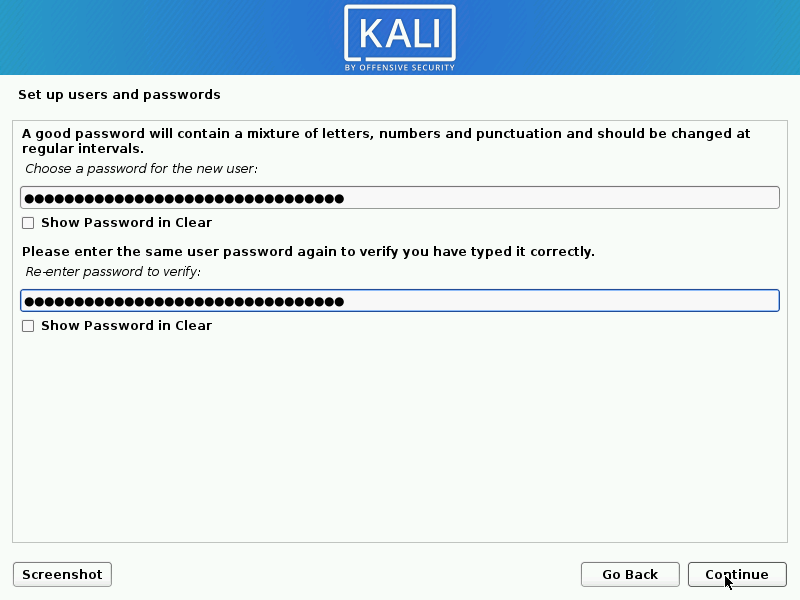
User Accounts:
Next, create the system user account (complete name, username, and secure password).
Now, set your time zone.
Disk: Depending on the setup, the installer will now probe your drives and present you with a number of options.
Full drive Encryption (FDE) can be enabled in Kali Linux by choosing Guided, which uses the full drive, and setting up encrypted LVM. If chosen, you will be prompted to enter a password twice later in the setup process (not covered in this article). This password must be entered each time Kali Linux is launched.
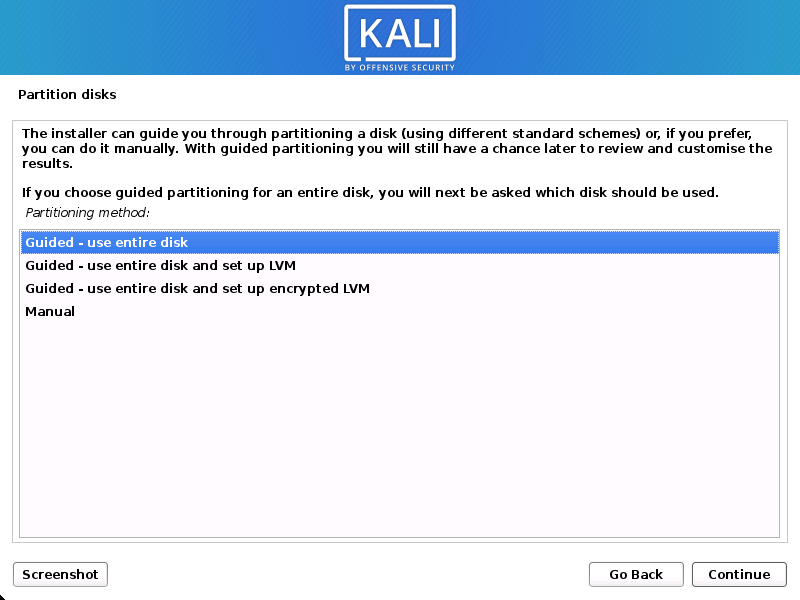
Select the disk to be partitioned.
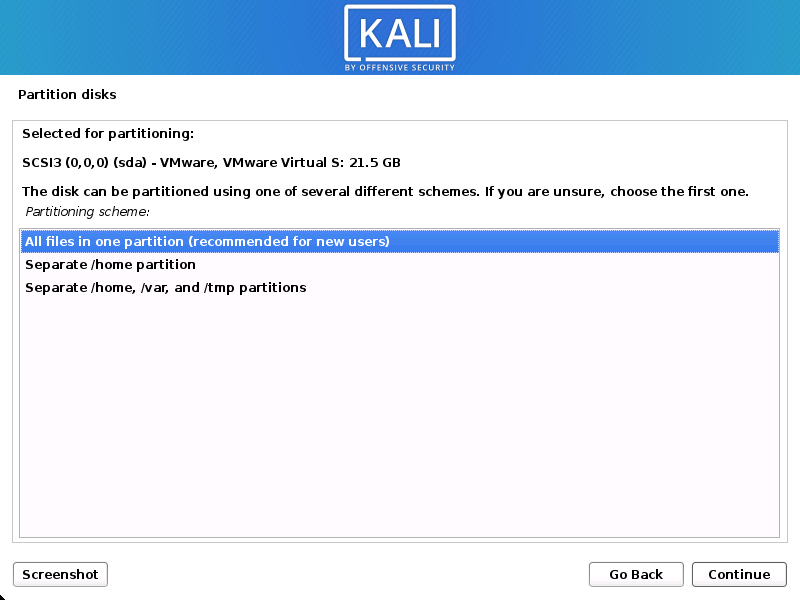
Depending on your requirements, you can either have distinct partitions for one or more of the top-level directories or, as is the default, maintain all of your data in a single partition.
“All files in one partition” is what you want if you’re not sure which you want.
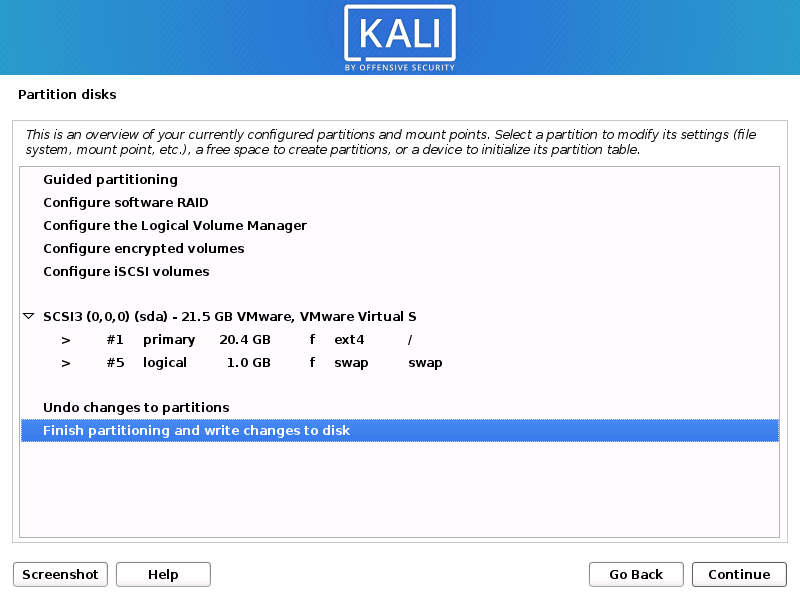
Before the installer makes permanent modifications, you will then have one more opportunity to check your disk setup. The installer will start working as soon as you click “Continue,” and your installation will be nearly complete.
Enhance your skills with our cloud computing training in Chennai.
Encrypted LVM: Before requesting your LVM password, Kali Linux will begin a secure hard drive wipe if it was enabled in the previous stage.
Please use a strong password; if you don’t, a weak passphrase warning will appear.
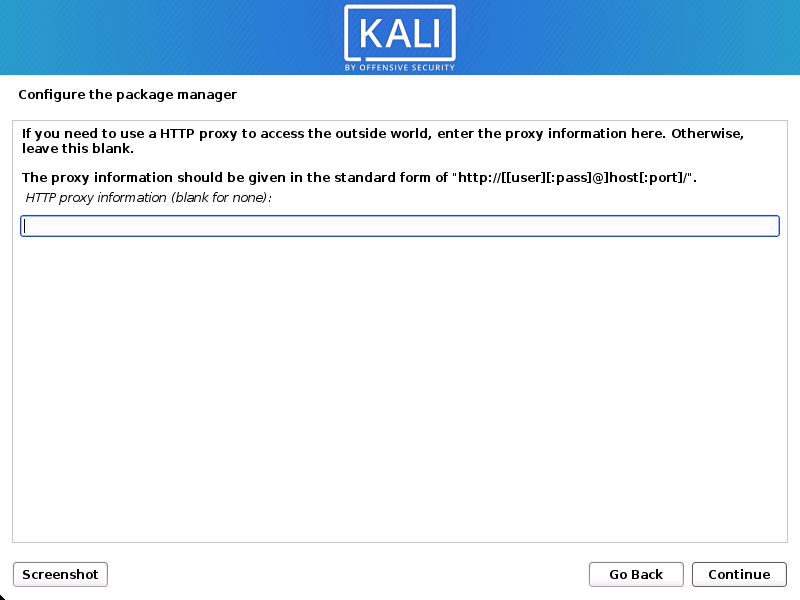
Proxy Data: Kali Linux distributes apps via a central repository. If necessary, you will need to enter the relevant proxy information.
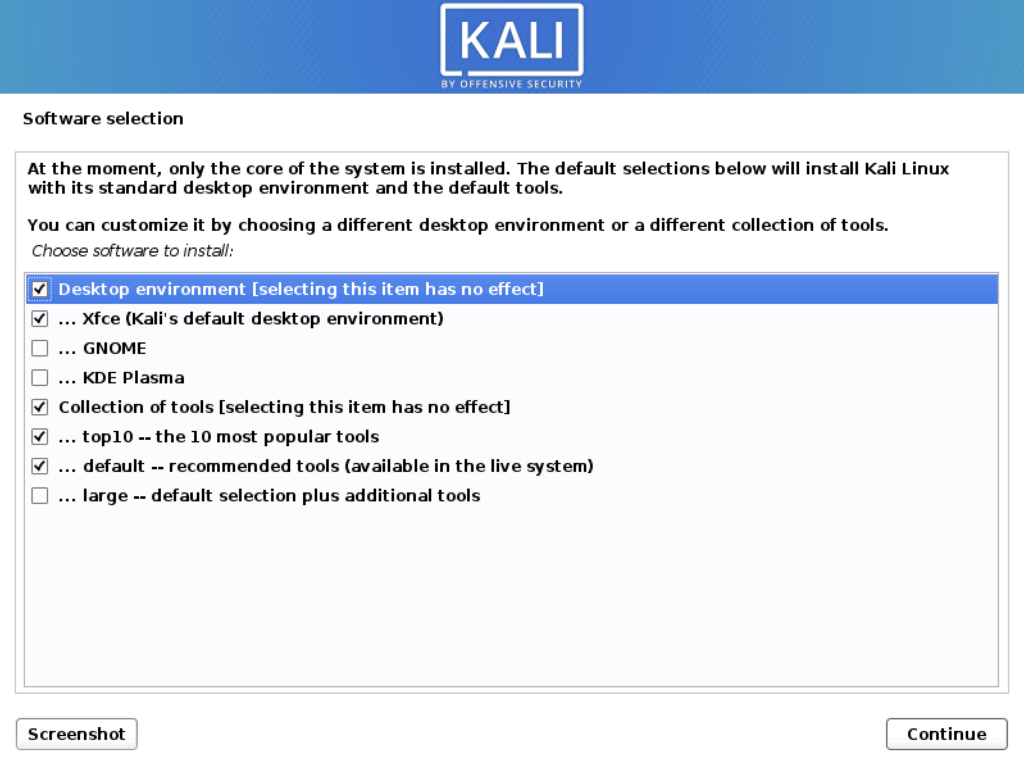
After that, you can decide which metapackages to install. You really don’t need to make any changes here because the default choices will install a normal Kali Linux system.
If you would rather alter the default choices, please see this guide.
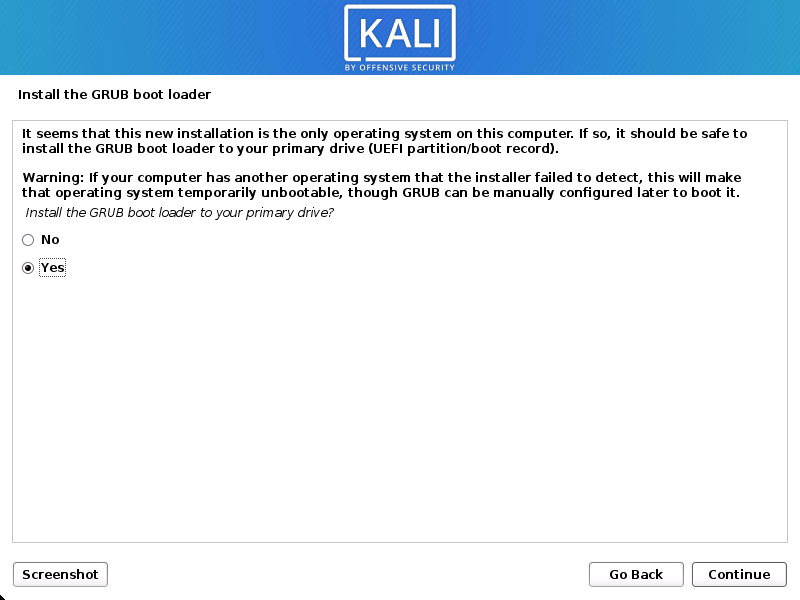
Next, make sure the GRUB boot loader is installed.
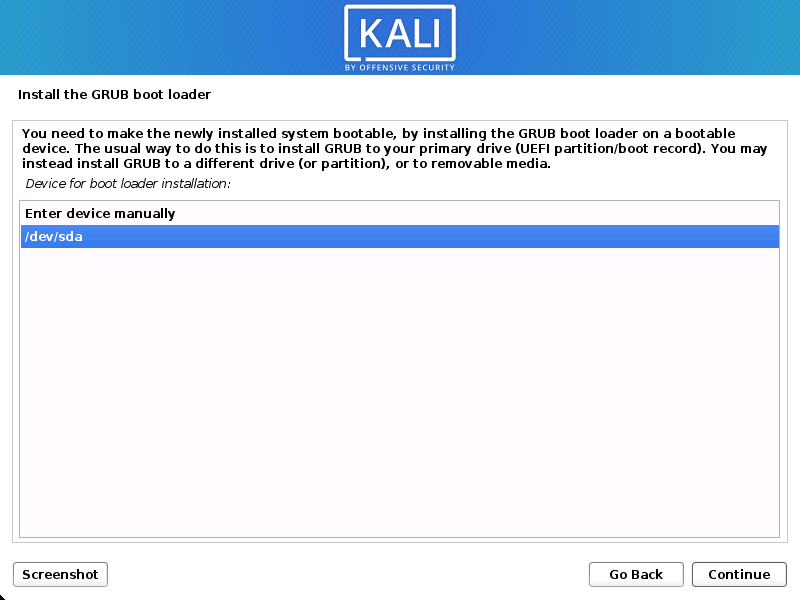
To install the GRUB bootloader, choose the hard disk (it doesn’t choose any drive by default).

Reboot: In order to restart your fresh Kali Linux installation, click Continue at the end.
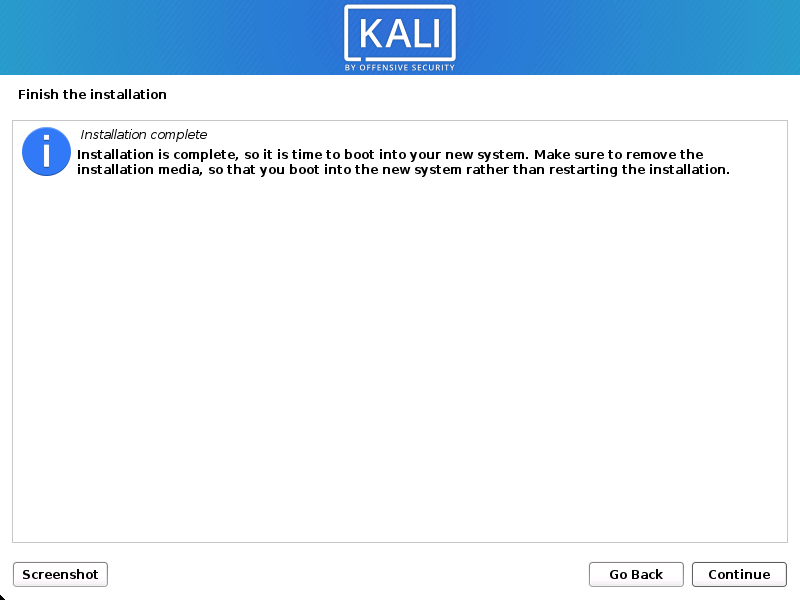
It’s time to personalize your system now that Kali Linux has been installed.
Conclusion
You can explore and experiment with cybersecurity on a strong platform by installing Kali Linux. When using its potent tools, keep in mind to use caution and ethical responsibility. Explore our software training courses and enrich your skills for a promising career.