When combined, Appium and Selenium can be utilized for thorough testing methodologies that include mobile and web platforms. An important benefit is that it supports both iOS and Android. You can create tests for several platforms using the same API because it enables cross-platform testing. Gain the fundamental understanding with this Appium tutorial for beginners step by step guide. Explore our Appium course syllabus to get started.
Getting Started with Appium
Appium is an open-source solution that saves time and effort when automating mobile applications. The following basic concepts will be covered in our Appium from scratch tutorial to help you begin using mobile automation:
- Core Concepts of Appium
- Setting Up the Environment
- Appium Fundamentals
- Platform-Specific Concepts
- Advanced Appium Concepts
- Best Practices for Appium
- Importance of Learning Appium Testing
Recommended: Appium Online Course Program.
Core Concepts of Appium
Here are the core concepts of Appium testing tool:
What is Appium?
Appium is an open-source mobile application automation solution that works with both iOS and Android. It is possible to write tests once and run them across platforms with a single API.
Key Features of Appium
Here are the key features of Appium:
- Cross-Platform Compatibility: Use the same codebase to create tests for iOS and Android.
- Multiple Language Support: Use the Selenium client libraries for Java, Python, Ruby, JavaScript, and C# to support many languages.
- App Types: Mobile, hybrid, and native web apps can all be automated.
- No App Modification: Examine compiled apps (such as those in.apk or.ipa format) without having access to the source code.
- Real Devices & Emulators: Conduct tests using real devices, Android emulators, or iOS simulators.
- Integration: Compatible with frameworks (TestNG, JUnit) and CI/CD tools (Jenkins, GitLab).
Appium Architecture
The Appium architecture is made to take use of current platform-specific automation frameworks and allow cross-platform mobile automation. Here is a thorough explanation:
Client-Server Model
The client-server architecture used by Appium is:
- Client: Using the WebDriver protocol, your test scripts (written in Python, JavaScript, or other programming languages) submit HTTP requests to the Appium Server.
- Server: WebDriver commands are converted into platform-specific actions (such as iOS XCUITest or Android UIAutomator2) by the Appium Server, a mediator developed in Node.js.
Key Components of Appium Architecture
Here are the key components of Appium:
Appium Client (Test Script): It communicates with the Appium Server by sending commands such as click() and sendKeys() using the Selenium WebDriver client library. It supports a variety of programming languages, including Ruby, Python, and Java.
Appium Server: It watches for client HTTP requests and directs commands to the relevant driver for the platform (iOS, Android, etc.). It oversees sessions and communicates with emulators and devices.
Platform-Specific Drivers:
Android
- UIAutomator2: Communicates with UI elements (by default on Android 4.3+).
iOS
- XCUITest: It is Apple’s native framework for iOS automation, and it is the default for iOS 9.3+.
Mobile JSON Wire Protocol: It expands the Selenium JSON Wire Protocol to manage behaviors unique to mobile devices, such as app installation, device rotation, and swipes.
End Device/Emulator: It carries out commands on simulators (iOS), emulators (Android), or actual devices.
Overview of Workflow
Step 1: A command is sent by the client:
- Example: driver.findElement(By.id(“loginButton”)).click()
- The client uses the WebDriver protocol to transform this into an HTTP request.
Step 2: The request is received by the Appium server:
- It identifies the target platform (iOS/Android) and verifies the request.
- It sends the command to the relevant driver, such as Android’s UIAutomator2.
Step 3: Platform Driver Executes the Action:
- The command is converted into native framework calls by the driver (e.g., UIAutomator2 APIs for Android).
- The device/emulator performs the action.
Step 4: Response is Sent Back:
- Through the Appium Server, the client receives the outcome (success or failure).
Session Management
- Every test run is a distinct session with a sessionId.
- A session with the required capabilities (platformName, deviceName, appPath, etc.) is created by the server.
Simplified Diagram

Key Advantages of the Appium Architecture
Here are the key advantages of Appium architecture:
- Cross-Platform: iOS and Android share a single API.
- No App Recompilation: Compatible with compiled apps (such as those in.apk and.ipa formats).
- Extensible: Plugins and custom drivers (like Windows programs) are supported, making it extensible.
- Open Source: Constantly updated by the user base.
Challenges in Appium Architecture
Some of the challenges in Appium Architecture:
- Issues with Latency: Communication between clients and servers may cause execution to lag.
- Dependency on Native Frameworks: Needs Xcode and the Android SDK to be properly configured.
- Element Identification: Stable locators, such as resource-id and accessibility-id, are necessary for element identification.
Suggested: Appium Interview Questions and Answers.
Setting Up the Environment for Appium
Below is the step by step guide to setting up the Appium environment:
Step 1: Installing Appium Server: Download and install the Appium Server.
Use the Node Package Manager (npm) to install Appium Server by opening your command prompt as administrator, making sure Node.js is installed, and then running “npm install -g appium” to install Appium globally. You can check the version of Appium by running “appium -v” in the command prompt.
- Prerequisites: Make sure you have Node.js installed on your system.
- Command: npm install -g appium
- Verification: appium -v
Step 2: Installing Node.js and npm: Essential for running Appium.
Everything you need to run a JavaScript program is included in the Node.js runtime environment. Before content is sent to a web browser, it is rendered by programs that operate on servers.
JavaScript code can be developed and shared using Node Package Manager (NPM), an application manager and repository. It makes it possible to manage dependencies for Node.js.
Step 3: Setting up Android SDK and/or Xcode: Necessary for platform-specific testing.
- Android SDK: If you are an Android developer, you should use the sdkmanager command-line program or the SDK Manager in Android Studio to obtain the most recent SDK Platform-Tools.
- This guarantees that the tools are readily updated and kept in the correct location alongside the rest of your Android SDK tools.
- XCode: A set of tools called Xcode is used by developers to create apps for Apple platforms. Manage every step of the development process using Xcode, from designing your app to testing, refining, and uploading it to the App Store.
Step 4: Installing Appium Client Libraries: Choosing and installing the appropriate client library (e.g., Java, Python, JavaScript).
Installing Appium client libraries involves first selecting the programming language you wish to use (such as Java, Python, or JavaScript), then using the package manager for that language to install the appropriate Appium client library. Installing “Appium-Python-Client” in Python, for instance, would enable you to write automation scripts for mobile apps in your preferred language.
Set up the client library:
- Java: Add the “appium” dependency to your project using Maven or Gradle.
- Python: The “Appium-Python-Client” package can be installed using pip.
- JavaScript: Install the “appium” package using npm.
Example commands:
- Python: pip install Appium-Python-Client
- Java(Maven):
Add<dependency><groupId>io.appium</groupId><artifactId>appium</artifactId><version>X.X.X</version></dependency> to your pom.xml
- JavaScript (npm): npm install appium
Step 5: Configuring Desired Capabilities: Recognizing and establishing the capabilities that the target devices and apps should have.
Using the Appium server’s graphical user interface to configure desired capabilities:
- Get your operating system’s Appium server file.
- Launch the Appium server.
- Select the “Search” icon.
- Set up the Appium Inspector.
- In the Name and Value boxes, type the desired capabilities.
- Select “Save As.”
- Give the capability a name.
- Select “Save.”
Setting Up Desired Features with a JSON Object:
- Define a JSON object’s key-value pairs.
- Request the Appium server for the test automation session using the JSON object.
Step 6: Device Setup: Configuring actual devices or emulators/simulators for testing.
Set Up a Mobile Device Using the Appium System:
- On your mobile device, activate USB Debugging Mode.
- PDANet+ In System Download.
- PDANet+ installation in the system.
- Use ADB to check if the system recognizes a device.
- Desired capabilities.
Basic Calculator App
Example:
import SwiftUI
import UIKit
@main
struct MyCalculatorApp: App {
var body: some Scene {
WindowGroup {
ContentView(controller: CalculatorController())
}
}
}
class CalculatorController: ObservableObject {
@Published var firstNumber: String = “”
@Published var secondNumber: String = “”
@Published var result: Int = 0
func calculateSum() {
if let first = Int(firstNumber), let second = Int(secondNumber) {
result = first + second
showAlert()
}
}
func showAlert() {
let alert = UIAlertController(title: “Result”, message: “The sum is \(result)”, preferredStyle: .alert)
alert.addAction(UIAlertAction(title: “OK”, style: .default))
if let windowScene = UIApplication.shared.connectedScenes.first as? UIWindowScene,
let window = windowScene.windows.first {
window.rootViewController?.present(alert, animated: true, completion: nil)
}
}
}
struct MyContentView: View {
@ObservedObject var controller: CalculatorController
var body: some View {
VStack {
TextField(“First number”, text: $controller.firstNumber)
.padding()
TextField(“Second number”, text: $controller.secondNumber)
.padding()
Button(action: controller.calculateSum) {
Text(“Calculate”)
}
}
}
}
Explore software testing training in Chennai to get started.
Appium Fundamentals
Here are the important Appium fundamentals:
Desired Capabilities
It defines the testing environment (platform, device, app). Key-value pairs called Appium Desired Capabilities are used to ask the Appium server for test automation sessions. A JSON object or the GUI application for the Appium server can be used to configure these features.
Appium Session
An Appium session serves as a conduit for communication between an emulator or device and an Appium server. It makes it possible to automate mobile tests.
What is the process of an Appium session?
- Before automation starts and when it is finished, an Appium session is launched.
- Automation commands are grouped together using a session ID.
- In a test, the session ID is shared by all commands that come after one another.
- Any commands sent with that ID are regarded by the Appium server as being from the same session.
How can an Appium session begin?
- The Session Builder panel allows you to define session capabilities before launching an Appium session.
- On the left, you can enter each capacity individually; on the right, you can edit the entire collection of capabilities in JSON format.
- The session can be started after the capabilities are configured.
How may parameters be changed in the middle of a session?
- Using the Settings API, you can change the parameters for a specific session while it’s happening.
- It is possible to alter the settings as many times as you want throughout a session.
Locating Elements in Appium
Like Selenium for online apps, Appium communicates with mobile app parts using the WebDriver protocol. Here’s how to find items in iOS and Android apps efficiently:
Using various locators (ID, XPath, accessibility ID, class name)
id (Resource ID or Accessibility ID):
- Android: resource-id (e.g., com.app:id/login_button).
- iOS: accessibilityId (assigned via accessibilityIdentifier in Xcode).
- Cross-Platform: Use accessibilityId for both platforms.
# Python example
element = driver.find_element(AppiumBy.ACCESSIBILITY_ID, “login_button”)
XPath:
- Although brittle, flexible (avoid complex hierarchies).
- Use it judiciously because UI changes may cause it to break.
element = driver.find_element(AppiumBy.XPATH, “//android.widget.Button[@text=’Login’]”)
className:
- This matches the class of the UI element (for example, android.widget.Button).
- When IDs are not available, use them, but make sure they are unique.
element = driver.find_element(AppiumBy.CLASS_NAME, “android.widget.Button”)
text or label:
- Match visible text (e.g., “Login” on a button).
- Android: text attribute.
- iOS: label attribute.
element = driver.find_element(AppiumBy.ANDROID_UIAUTOMATOR, ‘text(“Login”)’)
Understanding the UI Automator Viewer (Android) and Inspector (iOS)
androidUIAutomator (Android Only): Use the syntax of UIAutomator2 for more complex queries:
element = driver.find_element(AppiumBy.ANDROID_UIAUTOMATOR,
‘new UiSelector().text(“Login”)’)
iOSPredicateString (iOS Only): Use predicate strings for iOS-specific queries:
element = driver.find_element(AppiumBy.IOS_PREDICATE, ‘label == “Login”‘)
Tools to Inspect Elements
Appium Inspector:
- To examine element hierarchies, launch Appium Inspector using Appium Desktop.
- Create code snippets and capture interactions.
Note: Appium Server must be running, and your app’s bundleId (iOS) or appPackage/appActivity (Android) must be present.
Android Studio Layout Inspector: Instantaneously debug Android app layouts.
Xcode Accessibility Inspector: Use this to look for accessibilityId and other properties in iOS app items.
Learn testing from scratch with our manual testing courses in Chennai.
Appium Commands
Appium adds mobile-specific interactions for iOS and Android to the commands of Selenium WebDriver. A categorized list of important commands with Python examples can be found below:
Driver Initialization
Set up the Appium driver with desired capabilities:
from appium import webdriver
desired_caps = {
“platformName”: “Android”,
“deviceName”: “Pixel 5”,
“app”: “/path/to/app.apk”,
“automationName”: “UiAutomator2”
}
driver = webdriver.Remote(“http://localhost:4723/wd/hub”, desired_caps)
Element Interaction
Find Elements:
# By accessibility ID (cross-platform)
element = driver.find_element(AppiumBy.ACCESSIBILITY_ID, “login_button”)
# By XPath
element = driver.find_element(AppiumBy.XPATH, “//android.widget.Button[@text=’Login’]”)
# By class name (Android)
element = driver.find_element(AppiumBy.CLASS_NAME, “android.widget.Button”)
Click & Send Keys:
element.click()
element.send_keys(“[email protected]”)
Clear Text:
element.clear()
Gestures & Mobile-Specific Actions
Tap (Coordinate-Based):
from appium.webdriver.common.touch_action import TouchAction
actions = TouchAction(driver)
actions.tap(x=100, y=200).perform()
Swipe/Scroll:
driver.swipe(start_x=500, start_y=1500, end_x=500, end_y=500, duration=800)
Long Press:
actions.long_press(element).perform()
Multi-Touch:
from appium.webdriver.common.multi_action import MultiAction
action1 = TouchAction().tap(element1)
action2 = TouchAction().tap(element2)
multi_action = MultiAction(driver)
multi_action.add(action1, action2)
multi_action.perform()
App Management
Install/Uninstall Apps:
driver.install_app(“/path/to/app.apk”)
driver.remove_app(“com.example.app”)
Launch/Close App:
driver.launch_app() # Re-launch the app
driver.close_app() # Close the app
Background/Reactivate:
driver.background_app(5) # Run app in background for 5 seconds
driver.activate_app(“com.example.app”) # Bring app to foreground
Device Actions
Rotate Screen
driver.orientation = “LANDSCAPE” # or “PORTRAIT”
Press Hardware Keys
driver.press_keycode(24) # Android: KEYCODE_VOLUME_UP
Lock/Unlock Device
driver.lock()
driver.unlock()
Navigation
Go Back:
driver.back()
Open Notifications (Android)
driver.open_notifications()
Context Handling (Hybrid/Web Apps)
Switch to WebView:
webview_context = driver.contexts[1] # e.g., “WEBVIEW_com.example.app”
driver.switch_to.context(webview_context)
Switch to Native:
driver.switch_to.context(“NATIVE_APP”)
Waits & Synchronization
Implicit Wait:
driver.implicitly_wait(10) # Wait up to 10 seconds for elements
Explicit Wait
from selenium.webdriver.support.ui import WebDriverWait
from selenium.webdriver.support import expected_conditions as EC
element = WebDriverWait(driver, 10).until(
EC.presence_of_element_located((AppiumBy.ACCESSIBILITY_ID, “login_button”))
)
Advanced Commands
Execute Shell Commands (Android):
driver.execute_script(‘mobile: shell’, {‘command’: ‘pm list packages’})
Take Screenshot:
driver.save_screenshot(“/path/screenshot.png”)
Get Device Time:
print(driver.device_time)
Pull/Push Files (Android):
driver.pull_file(“/sdcard/file.txt”) # Download file
driver.push_file(“/sdcard/file.txt”, “Hello World”) # Upload file
Platform-Specific Commands
Android (UIAutomator2):
# Find element via UiSelector
element = driver.find_element(AppiumBy.ANDROID_UIAUTOMATOR,
‘new UiSelector().text(“Login”)’)
# Scroll to element
driver.find_element(AppiumBy.ANDROID_UIAUTOMATOR,
‘new UiScrollable(new UiSelector().scrollable(true)).scrollIntoView(text(“Submit”))’)
iOS (XCUITest):
# Find element via predicate string
element = driver.find_element(AppiumBy.IOS_PREDICATE, ‘label == “Login”‘)
# Scroll using mobile: scroll
driver.execute_script(“mobile: scroll”, {“direction”: “down”})
Basic Interactions:
- Clicking, typing, clearing text fields.
- Scrolling, swiping, and other gestures.
- Working with alerts and pop-ups.
Related Training: Selenium Testing Training in Chennai.
Platform-Specific Concepts
Appium is a cross-platform testing framework that works with Windows, macOS, iOS, and Android. One or more drivers support each platform.
Android Automation with Appium
Whether used on emulators or actual devices, Appium is a powerful tool for automating Android apps. A comprehensive guide to configuring, writing, and running tests for Android apps can be found below:
Step 1: Prerequisites: Ensure the following are installed and configured:
- Java JDK 8+ (Set JAVA_HOME environment variable).
- Android Studio (with SDK, platform tools, and emulator).
- Appium Server (npm install -g appium).
- UIAutomator2 Driver:
appium driver install uiautomator2
- Appium Client Library (e.g., Appium-Python-Client for Python).
Step 2: Desired Capabilities for Android:
In order to connect to the Android device or emulator, specify following features in your test script:
from appium import webdriver
desired_caps = {
“platformName”: “Android”,
“platformVersion”: “13.0”, # Android OS version
“deviceName”: “Pixel 5”, # Emulator/device name
“app”: “/path/to/app.apk”, # Path to APK
“appPackage”: “com.example.app”, # App package name
“appActivity”: “.MainActivity”, # Launch activity
“automationName”: “UiAutomator2”,
“noReset”: True # Avoid resetting app data
}
driver = webdriver.Remote(“http://localhost:4723/wd/hub”, desired_caps)
Step 3: Writing Your First Appium Test for Android:
Example: Login Test
def test_login():
# Launch app (already handled by desired_caps)
# Enter username and password
username = driver.find_element(AppiumBy.ACCESSIBILITY_ID, “username_field”)
username.send_keys(“[email protected]”)
password = driver.find_element(AppiumBy.ID, “com.example.app:id/password”)
password.send_keys(“password123”)
# Click login button
login_button=driver.find_element(AppiumBy.XPATH, “//android.widget.Button[@text=’Login’]”)
login_button.click()
# Verify success
welcome_message = driver.find_element(AppiumBy.ID, “welcome_text”)
assert welcome_message.text == “Welcome, User!”
Step 4: Locating Android Elements
To examine items, use Appium Inspector or UIAutomatorViewer (from the Android SDK).
Common Strategies:
Resource ID: driver.find_element(AppiumBy.ID, “com.example.app:id/login_button”)
Android UIAutomator Syntax:
driver.find_element(AppiumBy.ANDROID_UIAUTOMATOR,
‘new UiSelector().text(“Submit”)’)
XPath:
driver.find_element(AppiumBy.XPATH, “//android.widget.EditText[@resource-id=’username’]”)
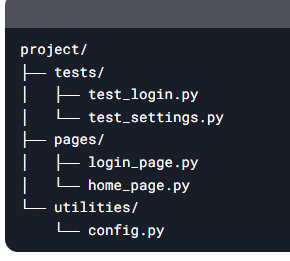
Example Project Structure:
iOS Automation with Appium
Due to Apple’s ecosystem limitations, Appium requires macOS and Xcode to automate iOS apps. Here is a detailed explanation on how to configure, write code, and run tests for iOS apps on both simulators and actual devices.
Step 1: Prerequisites:
macOS: Required for iOS automation (Xcode only runs on macOS).
Xcode: Install from the Mac App Store.
Command Line Tools:
Open Xcode → Preferences → Locations → Select Xcode version under Command Line Tools.
Homebrew: Package manager for installing dependencies.
/bin/bash -c “$(curl -fsSL https://raw.githubusercontent.com/Homebrew/install/HEAD/install.sh)”
Dependencies: brew install carthage libimobiledevice
Step 2: Appium Setup for iOS
Install Appium:
npm install -g appium
Install XCUITest Driver:
appium driver install xcuitest
Verify with Appium Doctor:
npm install -g appium-doctor
appium-doctor –ios # Check iOS dependencies
Step 3: Desired Capabilities for iOS
Configure capabilities in your test script:
from appium import webdriver
desired_caps = {
“platformName”: “iOS”,
“platformVersion”: “16.4”, # iOS version
“deviceName”: “iPhone 14”, # Simulator/device name
“app”: “/path/to/app.app”, # Path to .app (simulator) or .ipa (real device)
“automationName”: “XCUITest”,
“bundleId”: “com.example.app”, # App bundle identifier
“noReset”: True, # Preserve app state
# For real devices:
“udid”: “DEVICE_UDID”, # Get via `idevice_id -l`
“xcodeOrgId”: “TEAM_ID”, # Apple Developer Team ID
“xcodeSigningId”: “iPhone Developer”
}
driver = webdriver.Remote(“http://localhost:4723/wd/hub”, desired_caps)
Step 4: Writing Your First iOS Test
Example: Login Test
def test_login():
# Find elements using accessibility ID (recommended)
username = driver.find_element(AppiumBy.ACCESSIBILITY_ID, “username_field”)
username.send_keys(“[email protected]”)
password = driver.find_element(AppiumBy.IOS_PREDICATE, ‘label == “Password”‘)
password.send_keys(“password123”)
login_button = driver.find_element(AppiumBy.IOS_CLASS_CHAIN, ‘**/XCUIElementTypeButton[`label == “Login”`]’)
login_button.click()
# Assert success
assert driver.find_element(AppiumBy.ACCESSIBILITY_ID, “welcome_message”).is_displayed()
Step 5: Locating iOS Elements
To examine items, use Appium Inspector or Xcode Accessibility Inspector.
Common Strategies:
Accessibility ID: driver.find_element(AppiumBy.ACCESSIBILITY_ID, “submit_button”)
Predicate Strings:
driver.find_element(AppiumBy.IOS_PREDICATE, ‘label == “Continue” AND enabled == true’)
Class Chain:
driver.find_element(AppiumBy.IOS_CLASS_CHAIN,
‘**/XCUIElementTypeCell[`name == “Settings”`]’)
XPath:
driver.find_element(AppiumBy.XPATH, “//XCUIElementTypeButton[@name=’Cancel’]”)
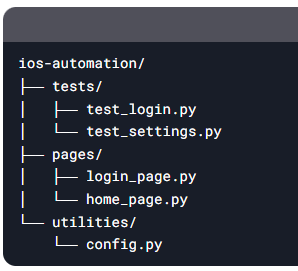
Example Project Structure:
Related Training: Mobile App Developer Training in Chennai.
Advanced Appium Concepts
Using desired capabilities, the Page Object Model (POM), and managing dynamic elements are examples of advanced Appium concepts.
Desired Capabilities:
- A configuration method that outlines the steps to establish an automation session.
- It includes configurations such as the application path, timeouts, automation engine, and device details.
Page Object Model (POM): It is a method for automating tests that works with Appium.
Handling dynamic elements and wait strategies: Methods for handling Appium’s wait tactics and dynamic aspects.
Some of the other advanced concepts in Appium are:
- Hybrid App Testing: Automating web views in mobile apps.
- Native Context Switching: Changing between contexts.
- Touch Actions and Gestures: sophisticated touch interactions (multi-touch, long press).
- Waiting Strategies: Using both explicit and implicit waits for element visibility.
- Managing Pop-ups and Alerts: Automating dialogs and alert interactions.
- Data-Driven Testing: Using outside data sources as test inputs.
- Test Framework Integration: Integrating Appium with testing frameworks, such as JUnit, TestNG, and pyTest.
- CI Integration: Using Appium tests in continuous integration (CI) pipelines (e.g., Jenkins, GitLab CI).
- Appium Server Flags: Recognizing and utilizing these helpful flags.
- Parallel Execution: Executing tests concurrently on several devices.
Appium Best Practices
Here are the proven best practices for successful app testing with Appium:
- POM: Use the Page Object Model (POM) to create reusable and maintainable tests.
- Test Data Management: Use various techniques for handling test data.
- Reporting and Logging: Produce insightful test reports.
- Error Handling: Implement reliable error handling in tests.
- Test Maintenance: Use techniques for keeping tests up to date and maintained.
Importance of Learning Appium
Learning Appium is important for the following reasons:
- Cross-platform compatibility
- Multiple language support
- Testing on real devices and emulators
- Open-source and free
- Integration with CI/CD pipelines
- High demand in the job market
Explore all software courses and kickstart your IT career.
Conclusion
You’ve made great progress toward becoming a skilled mobile automation tester by grasping the concepts given in this Appium tutorial for beginners. Develop your own test automation projects, try out various locators and motions, and keep learning about Appium’s features. Learn Appium from scratch with our Appium training in Chennai.